5 Sensory Bin Setups You Can Rotate Year-Round: Fillers, Tools & Storage Tips Made Easy
If you’ve ever watched your little one light up while digging, pouring, or scooping, you know just how magical a sensory bin can be. But finding the right fillers (that don’t make a huge mess) and keeping all the tiny pieces organized? That took me some trial and error.
Today, I’m sharing my favorite sensory bin fillers, must-have tools, and storage hacks that make setup quick and cleanup stress-free, so you can actually enjoy sensory play right alongside your toddler.
Why Sensory Bins Are Worth It:
When setting up our play area, I knew I wanted a space for my son to play, imagine, and explore textures safely.
I loved that sensory bins encourage fine-motor skills, independent play, and calm focus (especially on days when the energy levels are high.)
But they also do so much more. They also help kids build language as they describe what they feel, practice problem-solving, and even learn emotional regulation through repetitive, soothing play.
You can read more about our learning space here!
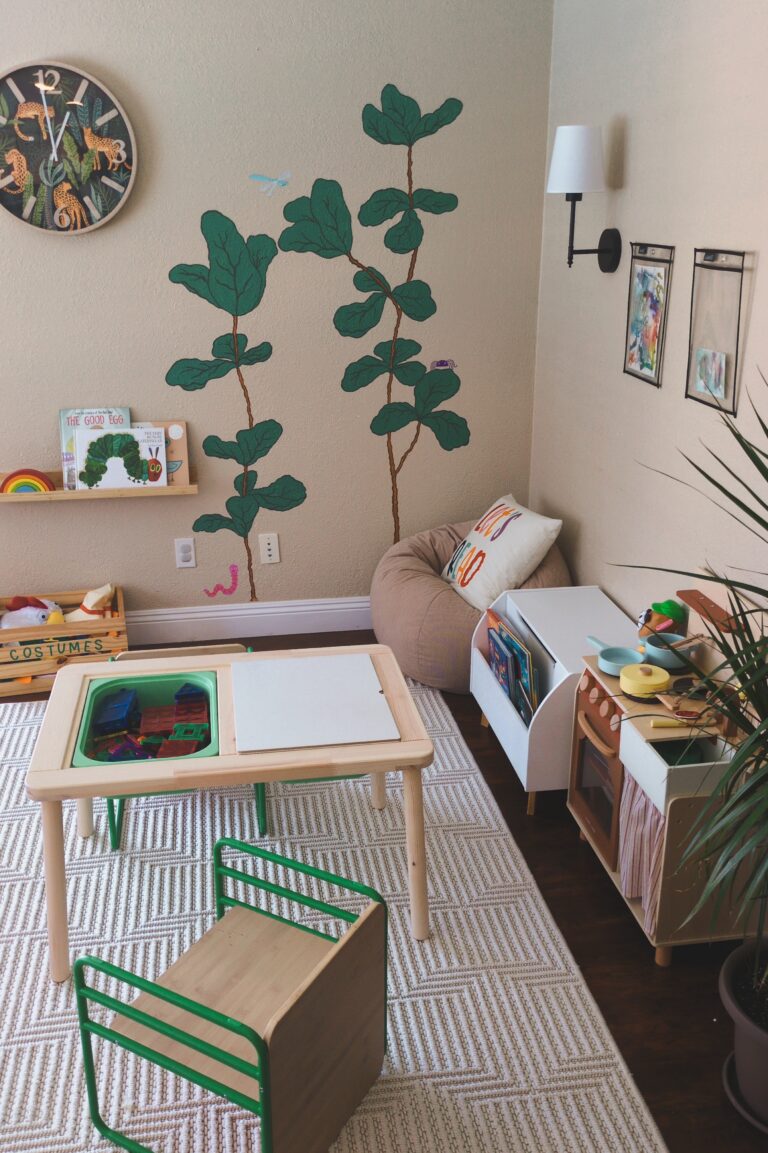
The Sensory Table That Started It All

We use the IKEA Flisat Table (you can find a similar sensory table here) — not because it’s fancy, but because it fits tubs with lids perfectly. That means I can quickly swap bins without dragging out a mess of supplies.
Once we had the table, all that was left was to fill it. Naturally, we started with our favorite theme: Dinosaurs!
1. Dino Excavation Site
Our very first sensory setup was a dinosaur dig site. My son is a true dino kid, so the thought of digging through sand and rocks to uncover toy dinosaurs and fossils was a dream come true.
He adored it, and I loved how it combined creative play with hands-on science exploration.
Here’s what we used:
- Play Sand
- Mini Dinosaurs
- Dino Bone Puzzle
- Fake Plants for a touch of prehistoric greenery

2. Black Bean Construction Zone
This one was a huge hit during our Labor Day “community helpers” unit. The texture of the black beans is satisfying for scooping, and the trucks add a clear imaginative goal.
Here’s what we used:
Book Connection: Pair this bin with The Digger and the Flower by Joseph Kuefler — a sweet story that introduces empathy and care while expanding vocabulary with words like hoist, dig, and push.

3. Corny Pumpkin Patch
Perfect for fall, this one is cozy, colorful, and corny 😛
Your toddler can “harvest,” scoop, and sort, all while practicing hand-eye coordination and sensory exploration.
Add these to your mini-pumpkin patch:
- Whole Kernel Dried Corn
- Miniature Pumpkins
- Toy Farm Animals
- Decorative Scarecrows
Keep this setup handy for Thanksgiving break, it’s a great calm-down activity between family gatherings!

4. Pom-Pom Hot Cocoa
Once the weather cools down, swap your fillers for something soft and snuggly, Like brown pom-poms for cocoa and white ones for marshmallows!
We added these items:
- Wooden Spoons
- To-go Cups
- Brown & White Poms
Enjoy a cup of real hot cocoa with your little barista afterwards! 😛

5. Sandy Ocean Floor
This one’s timeless and easy to refresh. It’s a wonderful choice for any time of year, and a great way to spark conversations about sea life, habitats, and textures.
Fill your ocean bin with these awesome finds:
- Blue Kinetic Sand
- Plastic Ocean Animals
- Pearl Beads
- Smooth rocks
Book Connection: Find It! Explore It! Ocean by National Geographic Kids – This book is full of ocean fun-facts and awesome imagery!

Tools That Make Sensory Play Shine
For sensory bins, the right tools make all the difference.
You don’t need to buy anything fancy, start with what’s already in your kitchen!
Here are a few must-haves:
- Scoops, Funnels & Measuring Cups
- Tongs or Tweezers (for sorting and grabbing)
- Sifters & Small Containers
- A good Sensory Tool Kit if you want something all-in-one
Why It Matters: These tools strengthen your child’s grip, coordination, and sorting skills — foundational for writing and math later on.
Storage That Saves Your Sanity
One of the biggest challenges with sensory bins? The clutter.
That’s why I switched to clear, stackable pencil cases with dividers — they’ve been a game-changer!
I keep the filler on one side and the themed items on the other. They’re easy to grab, label, and rotate. No more hunting through random bins or spilling sand all over the floor!

Affiliate Disclaimer: I may earn a small commission if you purchase through these links, at no extra cost to you. Thanks for supporting my blog!
Final Thoughts
Sensory bins are more than just a way to fill time. They’re a way to connect, teach, and calm. They offer space for your child to experiment, problem-solve, and relax, all while you get a moment to breathe.
And the best part? Once you’ve prepped a few, swapping them out takes minutes.
If you try any of these setups tag us on instagram @reashomegrown — I’d love to see what your little one creates!
❤️ Until next time